


Set up phpVMS on a subdomain
A subdomain, such as crew.yourva.com, is the easiest place to run phpVMS. Your main domain stays free for a landing page or a website, and phpVMS gets its own space.
1. Create a folder for phpVMS
In File Manager, create a folder in your home folder with the name of the subdomain, for example crew.yourva.com. Put it next to public_html, not inside it:
/home/youruser
  crew.yourva.com   <- extract phpVMS into here
  public_ftp
  public_html
2. Extract phpVMS into it
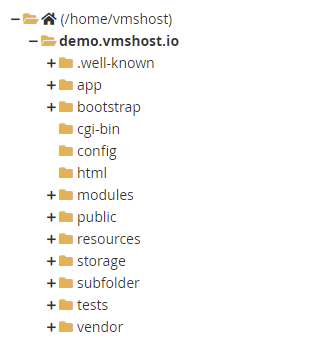
Upload the phpVMS package and extract it into the new folder. The folder then contains app, config, public, storage and the other phpVMS folders:
3. Create the subdomain
- Open your hosting plan in the client area. On the Management tab, click Subdomains.
- Type the subdomain (for example
crew) and select your domain. - In Document Root, type the folder from step 1 followed by
/public, for examplecrew.yourva.com/public. Don't leave it blank: a blank document root points the subdomain at a folder insidepublic_html. - Click Create Subdomain.
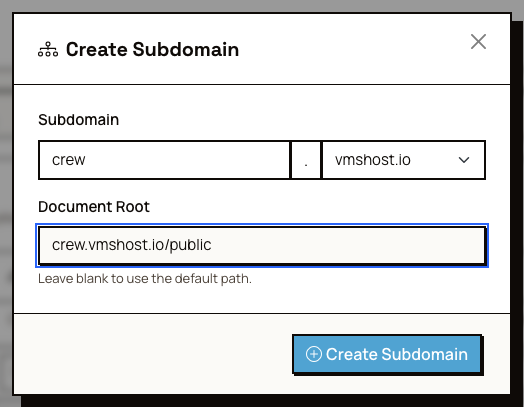
The document root must be the public folder. Only that folder should be reachable from the web. Your .env file and the rest of phpVMS stay private.
If your domain uses our nameservers, the subdomain works right away. If your DNS is somewhere else, add an A record for the subdomain that points to your server's IP address. The IP address is on the Overview tab of your hosting plan.
4. Run the installer
Go to the subdomain in your browser and follow step 3 onwards of Install phpVMS manually.
感谢您的反馈!