Using the Automated Installer
- Decide if you want your site to be on your main domain, or on a subdomain
- Meaning - yourva.com (main domain)
- Or, crew.yourva.com (subdomain)
- If on a subdomain, create the subdomain in cPanel
Start the Installer
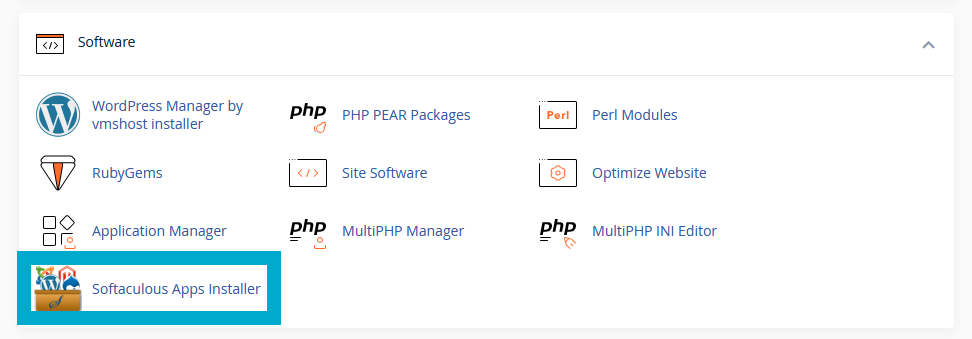
If the direct link to the Softaculous installer doesn't work, log in to cPanel, click on "Softaculous Apps Installer"

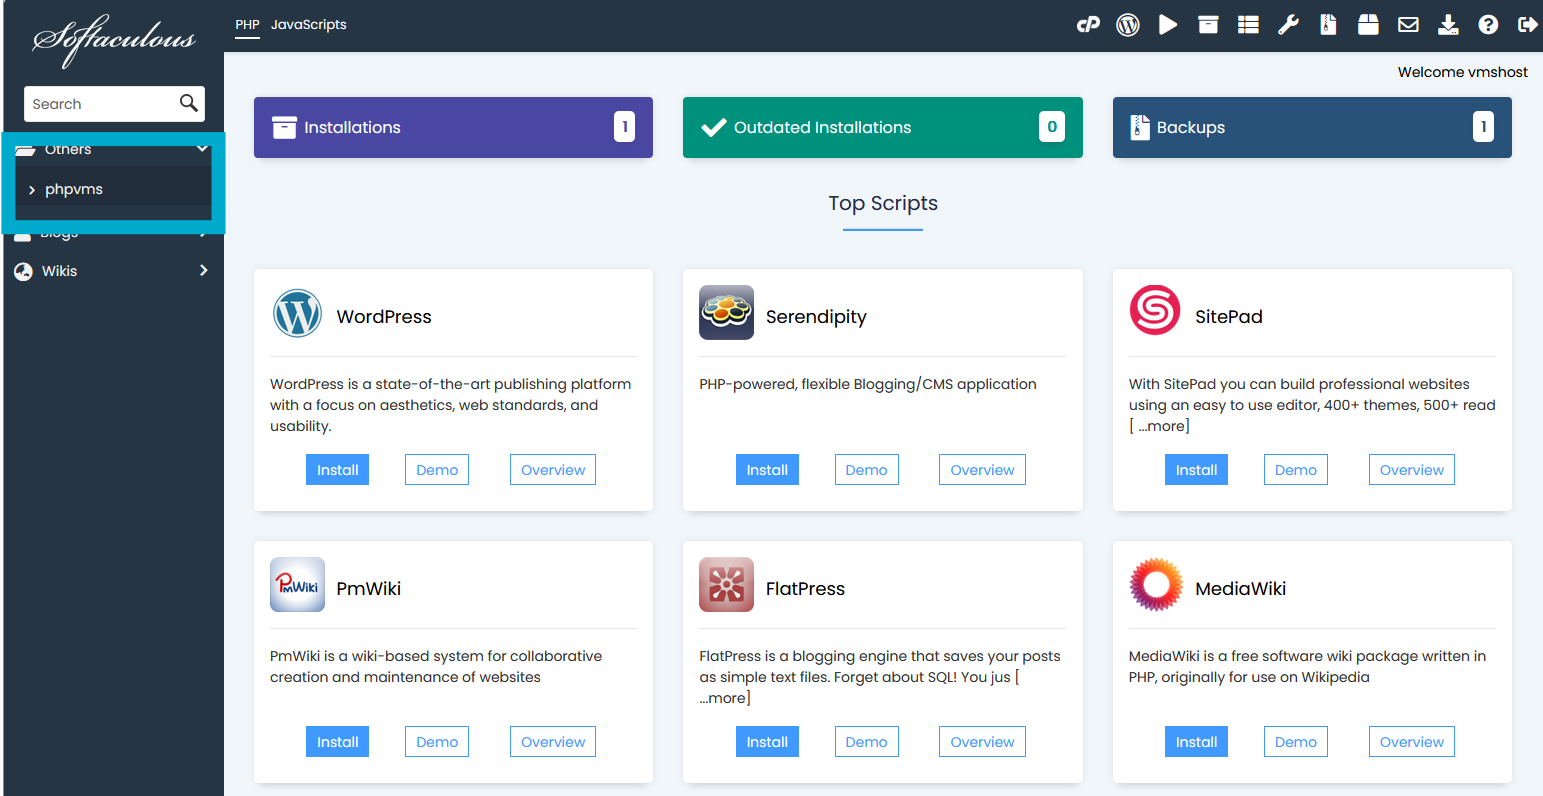
Then, in "Other" category, and look for "phpVMS":

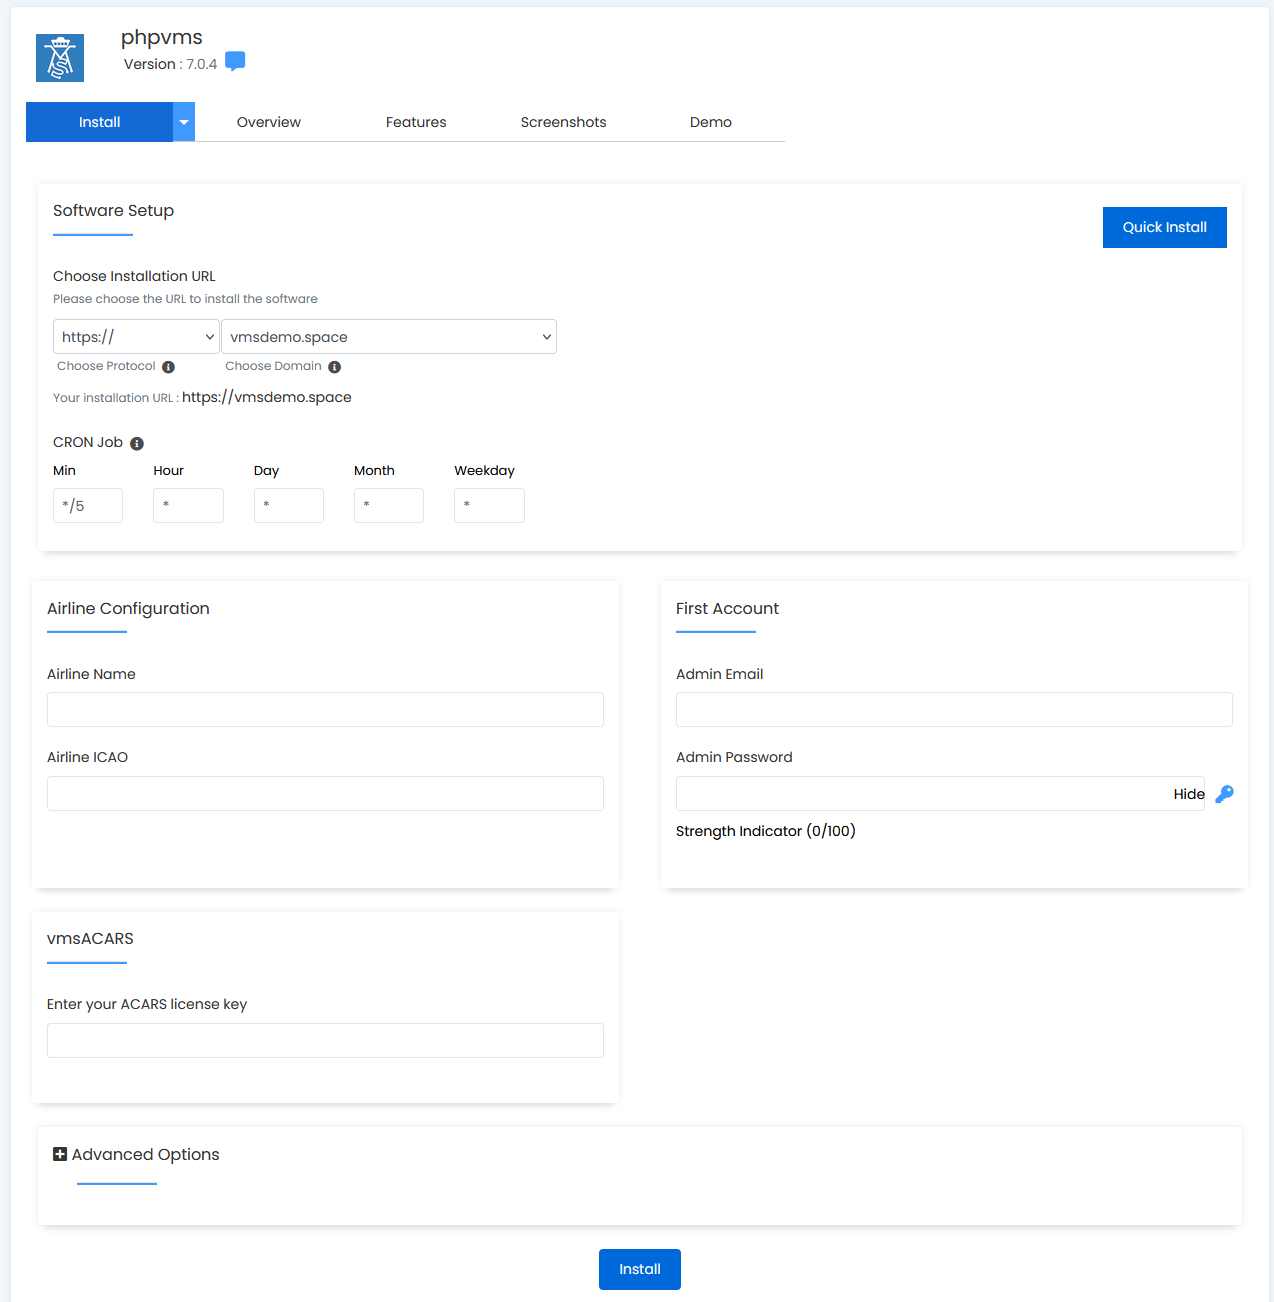
Select "Install". You'll see a screen like this:

- Enter your Airline Name and ICAO, and the first username and password
- If you purchased vmsACARS, also enter your license key
- Click "Install" - the database and everything will be configured for you!
Post Install Steps
- Open the .env file and enter your email information
- It's preconfigured for vmshost email
- If you create a new email in cPanel, you need to enter the reply to email, the username and the password
Important Locations
phpVMS is installed in two directories. The public files will be placed in the directory/domain you selected above. The main phpVMS install, however, will be placed into a separate directory, suffixed with ".phpvms". For example:
- You picked the subdomain "crew.yourva.com", and you set the directory to be "/home/yourva.com/crew.yourva.com"
- The publically exposed files will live in the above directory
- The main phpVMS install will be in "/home/yourva.com/crew.yourva.com.phpvms"
Important Notes
- This only does an install of phpVMS, and creates the database and cron
- You're free to customize/update phpVMS however you wish
- If you get an error installing, open a support ticket.
- Don't delete the "phpvms-install.log" file, in case you need support with the installer
- vmshost only provides this automated installer, not any extra customization.
Installing Manually
Visit the documentation to get details about how install phpVMS manually

